Kiln Controller – Internet of Things
Ever since my wife snagged a $10 kiln from a thrift store my aluminum has been much hotter than desirable when comes the time to pour. This is because with my kerosene fueled foundry, I had to constantly babysit it. There was no super heating of the aluminum because I was right there watching it. With the kiln though, I needed something to help me keep the heat under control: enter Raspberry Pi 3 with integrated wifi. I now get notifications on my phone when the kiln is up to temperature. No more sloppy hot melts. Take a look at the video on the project then see below for more details.
Inspiration:
This video was inspired by Make Magazine’s video on using openHab. The pyrometer I implemented comes from several sources. To the folks who followed up on my lathe videos in which I use the kiln to ask about the temperature I am grateful. For their encouragement and information, I offer acknowledgement first: HauntingCreations, Glen Felpel, Paul Arber, Centurial Inc. I also acknowledge myfordboy’s video on his pyrometer. I drew on Bob Claggett’s welding cart for the design of the kiln stand.
Hardware:
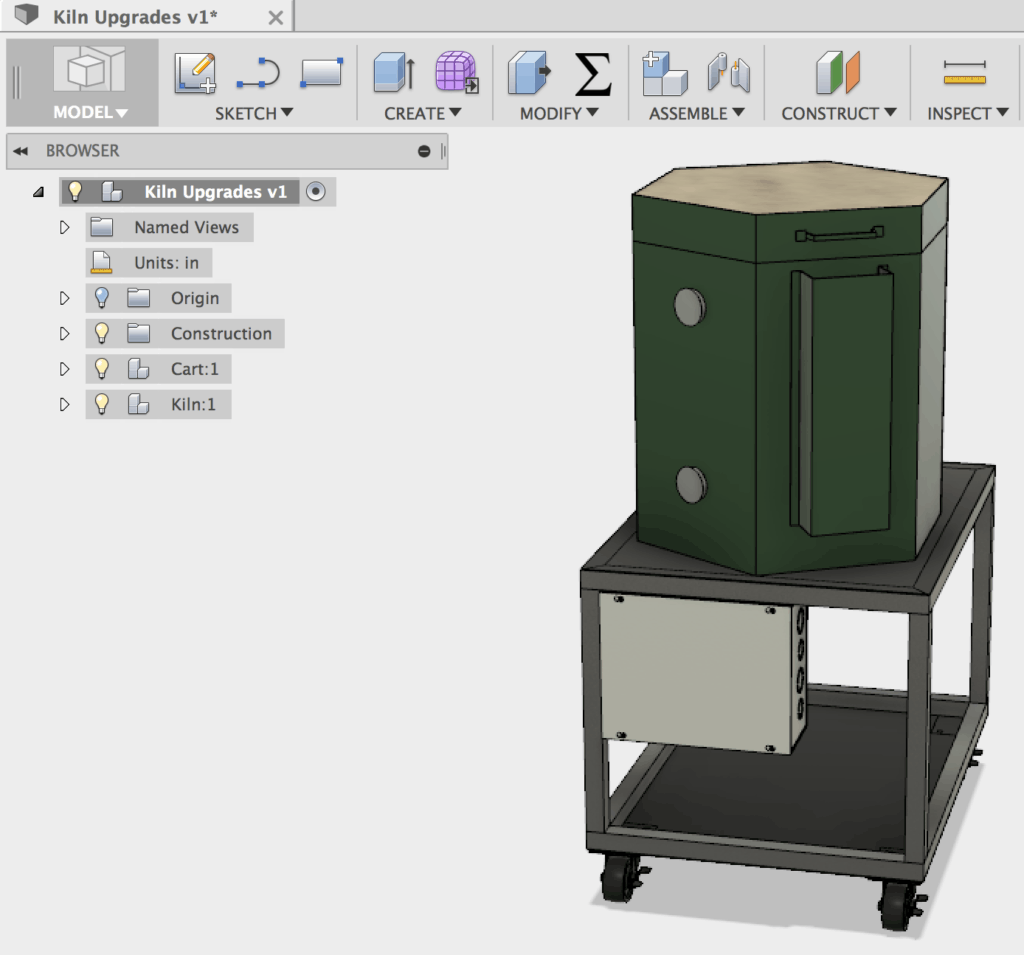
The Raspberry Pi outputs are not nearly beefy enough to drive the relay that I use to switch the 19A 120V AC kiln element. Furthermore, the Raspberry Pi cannot directly process the low voltage level’s generated by the k-type thermocouple. Both these considerations call for additional hardware. I designed an interface board using KiCad. The board includes a transistor and low voltage relay to drive the high current relay and a MAX31855 to convert the thermocouple to serial (SPI). Also, I modeled the cart in Fusion 360. I have included the schematics, board layout, and KiCad files below. You can access the Fusion 360 model below.
kiln_control_schematic KiCad files


Kiln Controller Schematic Plans (KiCad)
Software:
I initially referenced sparkfun instructions to select the SPI pins on the Raspberry Pi. However, I abandoned the SPI driver because the kiln temperature is a slow response system tolerant of sub optimal communication speed. I used the “bit-bang” v2.0 max31855 module. I wrote code python to encapsulate measurement and control code and interface with openHab.
Next I needed to schedule activities to facilitate regular sampling and control action. I did all this in openHab. All setup is done within the configuration files of openhab. Many of the pertinent operations are included below. Note that I started with an Ubuntu 14.04 Server already on the network.
One of the cool aspects of openHab that makes interfacing easy is the REST API. For instance you can pass commands to items by entering something like below into a linux terminal on the same network
openHab Setup:
To execute python scripts from openhab I had to install the exec binding add-on. I also had to ensure that the python script was accessible to the user openhab. For me this meant dropping the script in /etc/openhab/configurations/scripts, changing (chown) the owner and group to openhab:openhab, and changing (chmod) the permissions 644.
sudo apt-get install openhab-addon-binding-execs
sudo mv mcise_client.py /etc/openhab/configurations/scripts/
sudo chown openhab:openhab /etc/openhab/configurations/scripts/mcise_client.py
sudo chmod 744 /etc/openhab/configurations/scripts/mcise_client.py
openHab Rules rock! After getting the hang of it, rules were exactly the home automation solution for which I had been hoping, but debugging them was difficult at first. I found a helpful post regarding configuring logging to debug rules. After that configuration went much quicker.
Raspberry Pi:
The raspberry pi on the kiln needs two scripts one that pushes data to openHab for the temperature measurements; it also logs data locally. The second script waits for a command from openHab to change the state of the kiln heating element.
# cat /home/pi/openhab/start_openhab_service.sh
#!/bin/bash
tmux new -d -s mcctrl 'python /home/pi/openhab/mcise_server/__init__.py'
tmux new -d -s mcstat 'python /home/pi/openhab/push_temps_to_openhab_and_log.py'
echo "successfully initiate tmux sessions" >> makercise_script.log
echo `date` >> makercise_script.log
Note: the push_temps_to_openhab_and_log.py script pickles the temperature data locally on the kiln controller. I decided this was ok without a definite mechanism to eliminate old data. Whenever the kiln is plugged in, it will be logging data locally in addition to pushing it to the openhab server. This will probably cause problems later, but I chose to defer that solution until later since I unplug the kiln when it isn’t in use. The automatic startup scripts take about 30 seconds to initialize the controller and connect to openhab.
Garage Lights:
While I was at it I also took the time to upgrade the garage light controller.
Drawback:
My only complaint with openHab is implemented with java and rules use java-like syntax…why, why, why?
The first power outage I had was two days after the 1st melt using the kiln controller. I had not configured anything for automatic starting, so it was no surprise when neither openhab nor the client scripts resumed after the power was restored. To get the server to start the openhab service automatically I used this command:
sudo update-rc.d openhab defaults
The Raspberry Pi required relatively little configuration to do to initiate the required scripts. I followed the instructions on stackexchange.
# sudo update-rc.d openhab_client defaults
# cat /etc/init.d/openhab_client
#!/bin/bash
/home/pi/openhab/start_openhab_service.shEdits:
Update:
OpenHab announced a change to their certificates that broke my ability to connect in to my openhab implementation remotely. I followed their recommendations and updated Java from 1.8.0_91 to 1.8.0_101 to fix the remote connectivity. My router decided right in the middle of melt to assign the raspberry pi a new IP address when the lease on its previous address expired. This broke some of the code and necessitated a jumper to engage the relay since I had a partially molten charge in the crucible. In addition to reserving IP addresses in my routers DCHP configuration based on the device MAC, I also added code to the raspberry pi (from stackexchange) to grab the IP address from wlan0 as dynamically assigned:
import socket
import fcntl
import struct

def get_ip_address(ifname):
 s = socket.socket(socket.AF_INET, socket.SOCK_DGRAM)
 return socket.inet_ntoa(fcntl.ioctl(
 s.fileno(),
 0x8915, # SIOCGIFADDR
 struct.pack('256s', ifname[:15])
 )[20:24])


