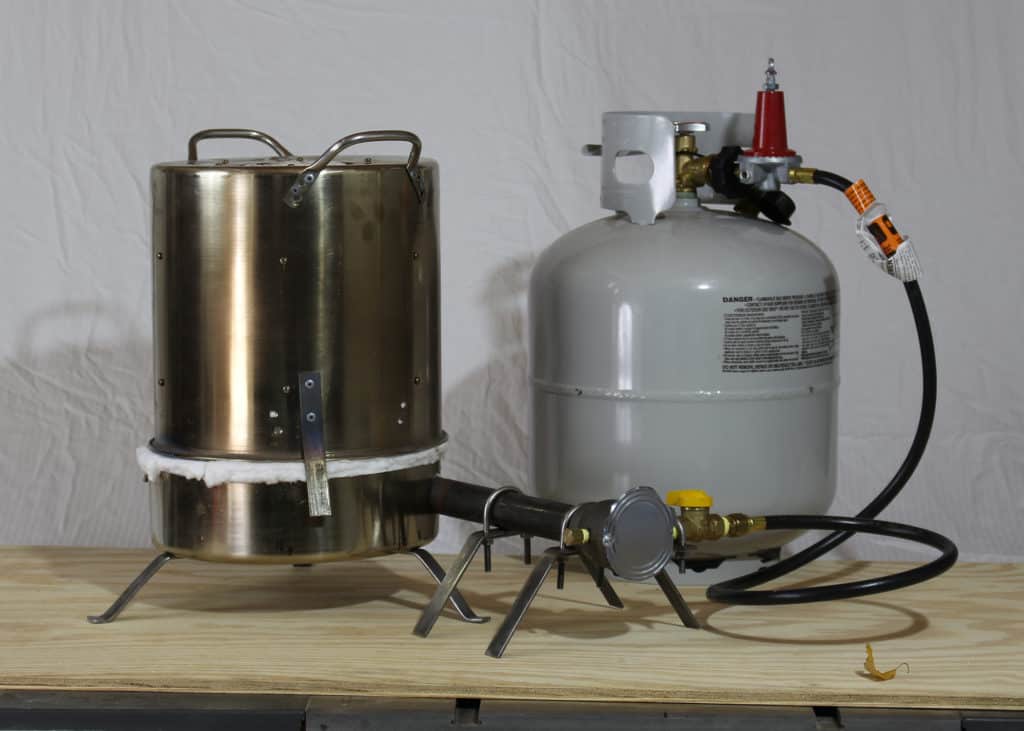
Would you like to be able to melt aluminum anywhere? Well, I certainly do. I wanted to melt aluminum to demonstrate metal casting at Maker Faire Atlanta but did not have a feasible foundry in which to do so. My kiln would be too slow for regular demonstrations. My old kerosene foundry was languishing in disrepair, but regardless foundry’s that use a sand and clay refractory are fairly heavy. I decided that I would like to make a portable lightweight propane-fired foundry. The foundry weighs in at 5.14kg (11.3lbs), without crucible or fuel cylinder, and the burner weighs in at 2.14kg, (4.7lbs). I also created a video to show the process in rough detail.
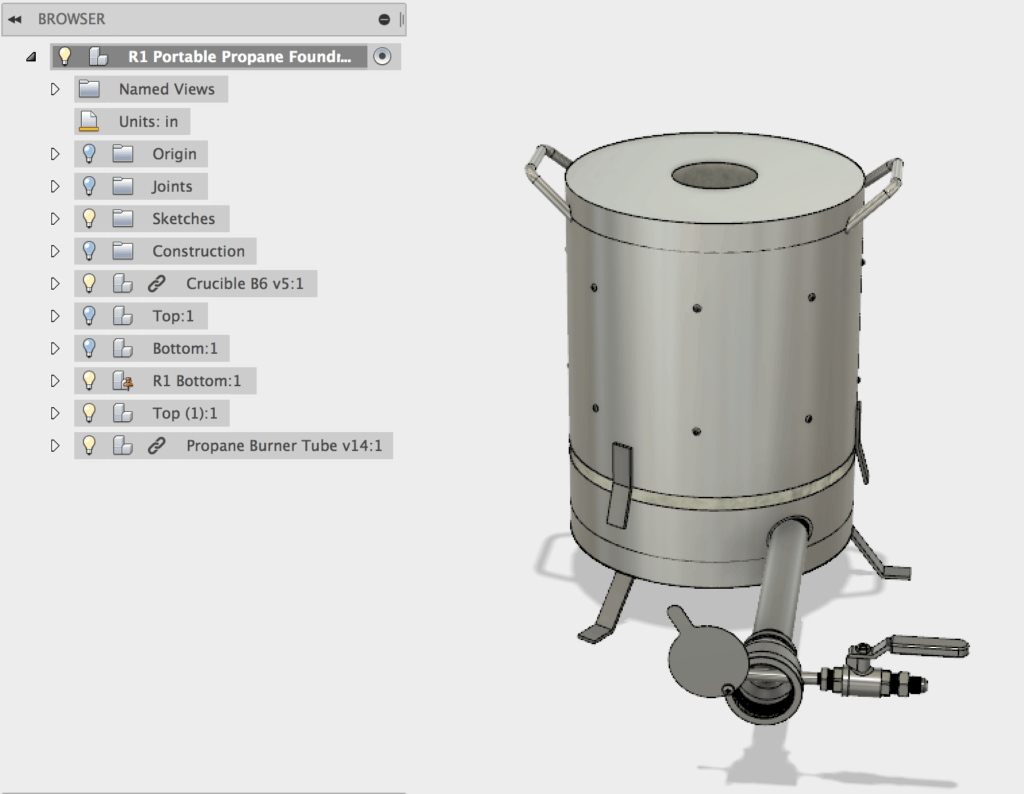
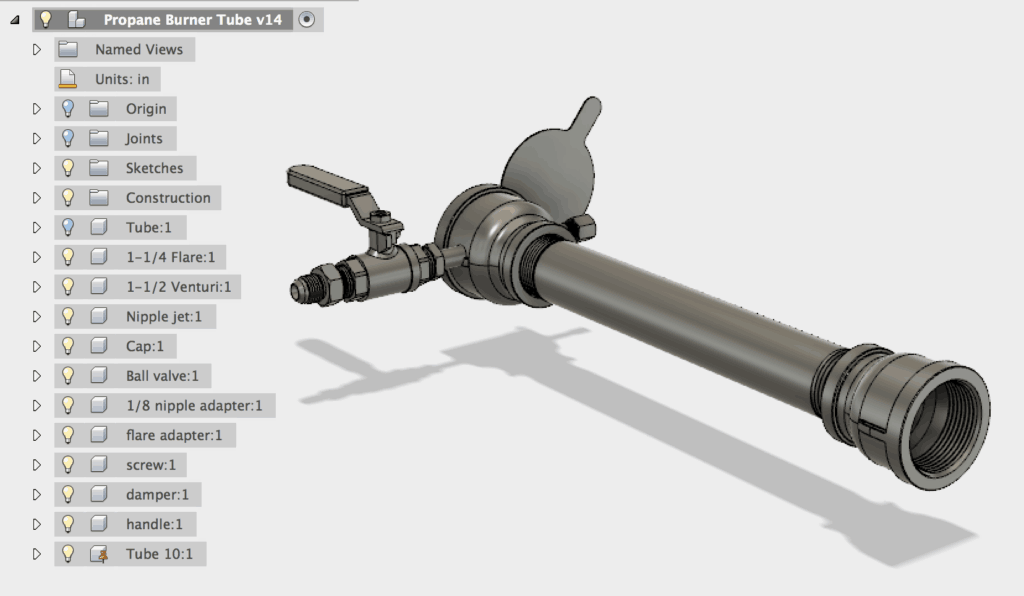
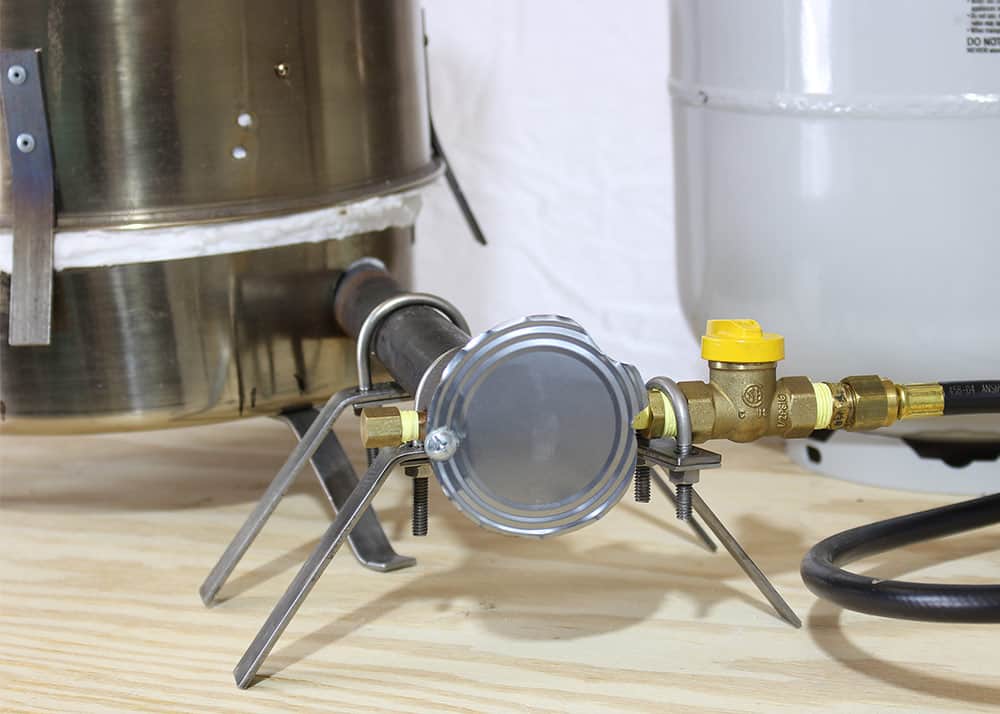
My initial design was based on a single 16 quart stainless steel pot I found locally. I modeled the foundry in Fusion 360 and have made that file available publicly above; click on the images to access. I also modeled and built a Reil style burner. I referenced several of the top google searches on the topic, instructables, the King of Random’s gas blaster video as I built my burner. I won’t go into detail on the burner since those references give a good treatment to the burner fabrication. The primary features of my foundry are:
- Full lid exposing the crucible for manipulation
- Ceramic fiber insulation for lightweight construction
- Materials available locally with the exception for ceramic insulation
- Stainless steel cookware
- Generic plumbing fittings
My initial design worked great for the lid and the burner. I had to switch to a gas ball valve since I originally didn’t realize there was a difference. The base was a bit more involved to rework. I first designed a base using the pot’s lid and incorporating firebrick, ceramic wool insulation, and refractory cement. The initial base design was unsatisfactory, and I had to spend a little bit of time refactoring the base. I obtained the pot locally. Because it was relatively inexpensive, I figured it would not be a bad choice for the base either. Using a second pot was revision 1 of the design, and I am really happy it worked out that way. The base without the refractory cement–using only the ceramic fiber wool–is much lighter.
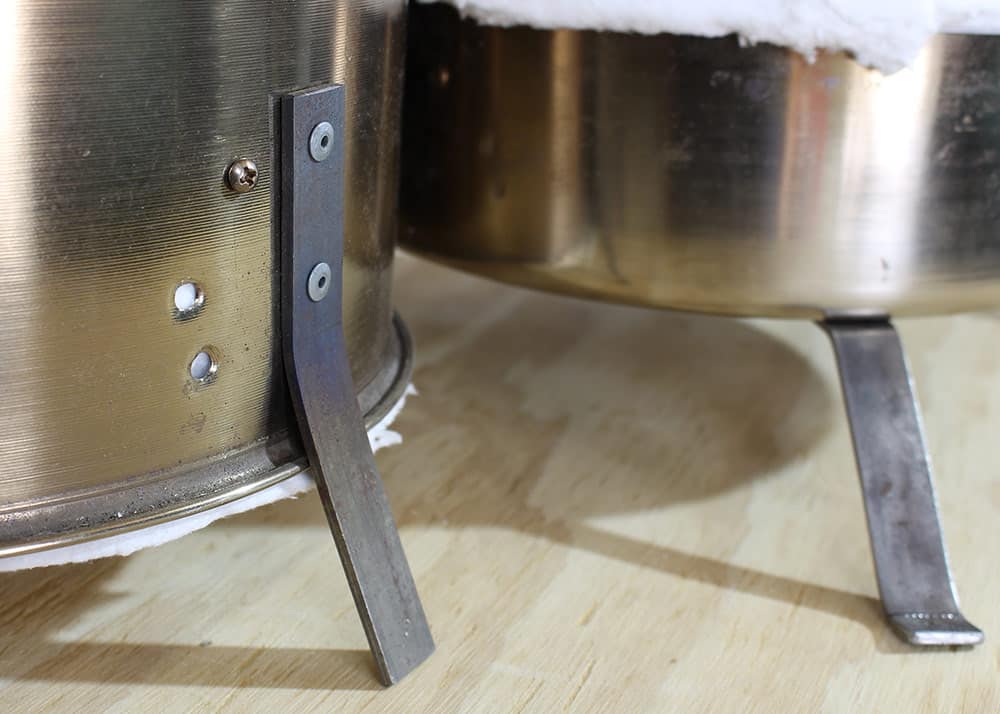
I really like the lid design. 1/2″ #6 stainless screws in the outside of the pot are all that I used to secure the ceramic wool. I used 3/4″ x 1/8″ bar to fabricate all the mounting feet and alignment tabs with the exception of the handles which were re-purposed from the pot. These were all attached to the stainless shells with steel rivets. Note that I used the closest bit I had from a set of small hobby drill bits, I did not specially purchase a tiny drill bit. Something close to 1mm will work fine. The bill of material is below. You can support this content by using these affiliate links to purchase the material if you decided to construct your own foundry using similar materials.You can likely find some of these materials locally. It is likely you cannot find some of these materials locally…use the Amazon links hint hint.
| Part | Price | Affiliate Link |
| Propane Cylinder | $42.86 | http://amzn.to/2dhUlSp |
| Gas Regulator and hose | $37.08 | http://amzn.to/2dhUXHt |
| 3/8″ Flare to 3/8″ MIP | $5.29 | http://amzn.to/2d9OfmA |
| PTFE Gas Pip Thread Tape | $4.25 | http://amzn.to/2cRwlHt |
| Gas Ball Valve | $12.85 | http://amzn.to/2dhUk0x |
| 3/8″MIP to 1/8″NPT | $3.70 | http://amzn.to/2cRwuKL |
| 1/8″NPTx4″ Brass Nipple | $3.54 | http://amzn.to/2cW7Fu3 |
| 1/8″NPT Cap | $2.14 | http://amzn.to/2cW8uTN |
| 1-1/4″x1″NPT Reducer | $7.93 | http://amzn.to/2cuzix1 |
| 1″NPTx10″ Steel Nipple | $7.81 | http://amzn.to/2cprcal |
| 1-1/2″x1″NPT Reducer | $11.54 | http://amzn.to/2dko7Zj |
| 16qt. 10″Tall 11″ diameter Stainless Stockpot | $19.99 | http://amzn.to/2cpsy5f |
| 2600F Cerachem 31″x24″x1″ Ceramic Fiber Insulation | $62.50 | http://amzn.to/2cW9lnq |
| Stainless Screws #6 1/2″ | $10.75 | http://amzn.to/2cuAUqF |
| Fire Bricks | $32.64 | http://amzn.to/2cSdIBA |
| 3/4″x1/8″x48″ Steel | $11.68 | http://amzn.to/2dknsHd |
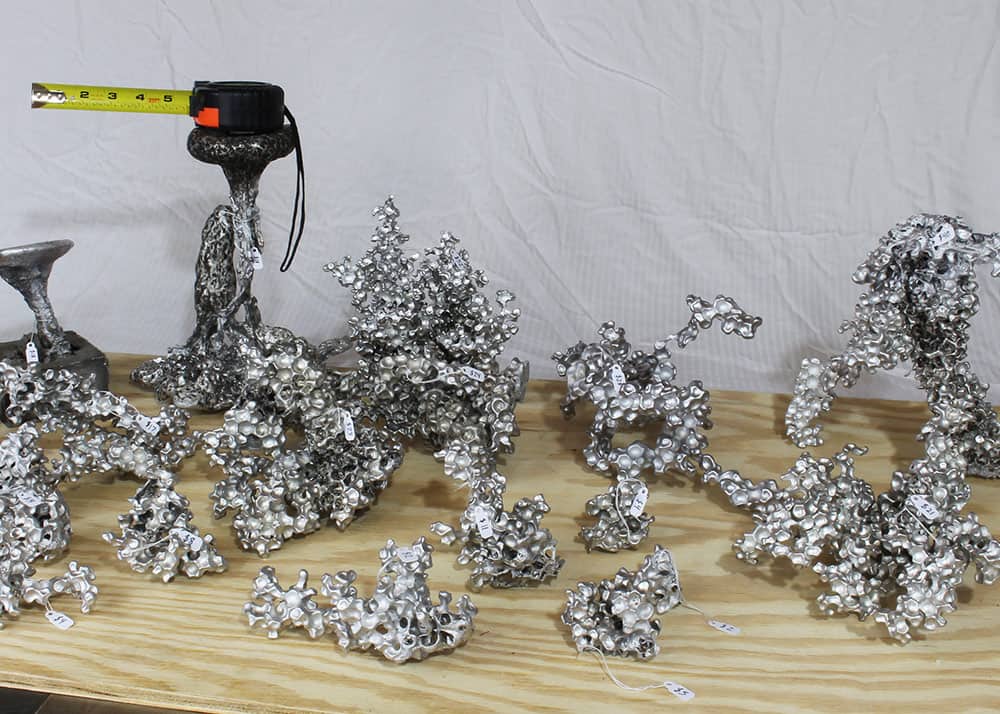
I bought a new number 6 crucible from McMaster-Carr and fabricated a set of tongs that double as a pouring shank. The first use for the foundry was in heating the steel to form the tongs. I used a crucible made from a fire extinguisher as the mandrel around which I bent the bar. I used a steel rivet and an inexpensive flux-core wire welder to weld the tongs. The first parts that I cast were some abstract castings in “wobbly balls” as my son says. Me using these water absorbent polymer balls was inspired by The Backyard Scientists videos. I also tried some lost foam casting for the first time. My sand was very dry so the casting didn’t turn out well. Finally I tried casting into Water Absorbent Crystals sold to improve garden soil. The hydrated crystals do not seem to resist the flow of the melt sufficiently. I got lots of weird blobs using that method.
Many of the castings turned out. I have already sold several, and plan to take the remainder to Maker Faire to try and sell. We’ll see how it goes. If you want one let me know, info@makercise.com. They are between $10-$50 each.
Before I release videos for general consumption, I will send an email to you to give you access. Be sure to approve Makercise.com if necessary so your early release doesn’t end up in a spam folder. Thanks again.
